Showing posts with label tutorial. Show all posts

8.05.2011

Granny Square top tutorial


This top is very versatile and can be made in any size and use most any yarn. The pattern starts after working the size of the granny square needed to fit across chest and slightly wrap around side. I made a 2t size with worsted yarn and H hook.


Make 2   *front and back


Front
Starting with a 9 row granny square.


Row 10..slip stitch to ch2 space, slip stitch in ch2 space 2x, ch2 2dc in the corner space work in pattern to 4th corner (leaving last side un-worked/neckline) work 3 dc in that corner.


Sleeve 1... 
Ch3 turn, work in pattern til you have 5/3dc groups ch2 turn hdc evenly across ending with 2hdc in the starting ch3 space. Ch2 turn repeat hdc row back down sleeve. Ch1 turn sc across working 2 sc in ch space below.


Work Sc evenly across top of granny square (this is the neck line) 


Sleeve 2...
Ch3 work granny pattern in next 4 ch1 spaces in 5th space 1 dc ch2 turn hdc evenly across working 2 hdc in ch3 space. Ch2  work  hdc across. Ch1 turn sc across 2 sc in corner and sc across top til you reach sc worked for neckline. (about 5 sc) slip stitch and fasten off.


Repeat for back

You now just need to join them together. You can pretty much do this any way you like  but I like to have a little give in between them so I have written up the way I like to do this. Hopefully it is not to confusing for you.


Joining side seams
Put right sides together. Starting with the top layer in the ch2 space of bottom corner. Make your starting loop pull through the top layer of ch2 space, Ch2 and slip stitch from front to back of bottom layer.  *Yarn over and dc into the next stitch in the top layer. Then from front to back in the bottom layer insert hook and pull yarn through both loops on hook. Repeat from * Work up to the bottom sleeve seam then sc the two sleeves together and fasten off.


Repeat for other side seam. 


Joining neck line..
Starting from top corner shoulder seam work the joins the same as side seam til a little after the sleeve for both side. (about 10-12 stitches)


Weave in all ends and turn right side out. 


To finish it off I like to add a few rows of hdc (unjoined) to the front and back of the bottom edge                   


Hope you enjoy and please let me know if I forgot something or if you have any questions...:)

4.22.2011

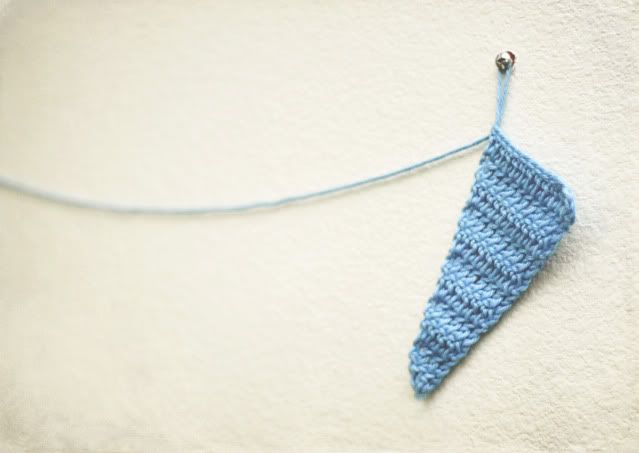
Sweet and Simple bunting....(pattern)


US Terms,
G hook
Knit picks /shine worsted

(Ch 2 counts as dc)

Ch3
Row1: 2 dc in first chain (3dc)
Row 2: Ch2 turn. Dc in same space as ch2, dc in next dc and in starting ch  (4dc)
Row 3: Ch2, turn. Dc in same space as ch2 dc in remaining dc and turning ch  (5dc)
Repeat Row 3 until you have 13 dc's in a row or for 11 total rows.


As you can see you can easily shorten or lengthen the size of your bunting.


For the connecting "ribbon"

Ch25, sc across top of bunting ch5 sc across next and so on ending with ch 26,
turn and sc in 2nd ch from hook and in each space across. Fasten off.


1.21.2011

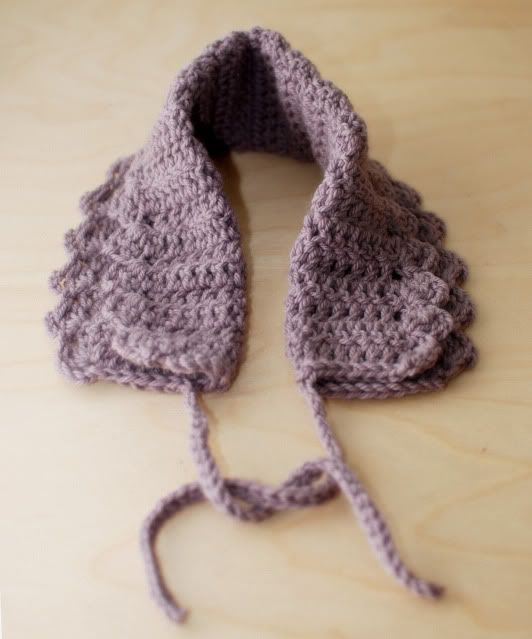
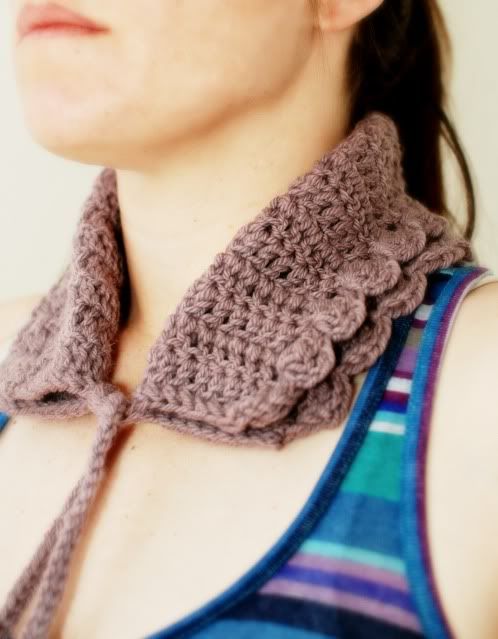
Crochet Collar Pattern

Saw a picture of something like this in a japanese crochet book and had to make my own version.
No clue how close it is to the real pattern "written pattern wise" but the finished product is good enough for me.


US terms
Worsted yarn
G/4.25mm hook
Ch 20 dc in 3rd ch.

Work 32 rows of dc

Row 33: sc across dc's 9 times then ch. 35, slip stitch all the way back then finish sc across row.


You are now working along side your dc rows attaching ch and cluster group to the top side of every two rows to get your shell.
 
ch4 3 dc cluster in same space as starting ch. sc in side/top of second dc row from start.,
*ch4 3dc cluster in last sc, sc in side/top 2 rows above last sc. Repeat from * until reaching the end.


For the bottom and other side repeat  from row 33.

Fold in half and wear :)

This of course could be easily sized down, just shorten the dc rows...


1.12.2011

Simple Crochet Coasters

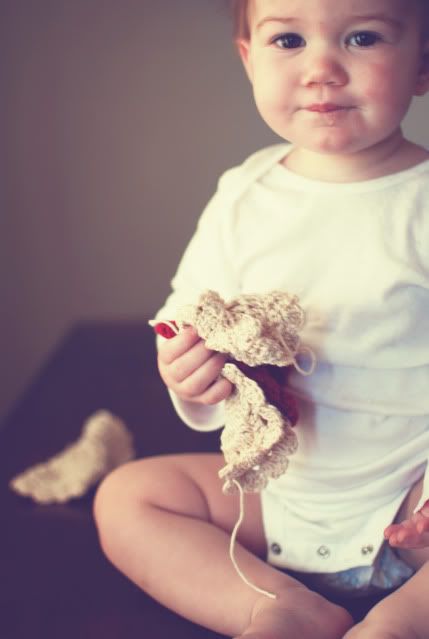
In an effort to take what I can get, I made up some cute crochet coasters randomly throughout the past few days. Trying to recover from the holidays now that the kids are back in school and hubby is back to work. Amazing how even with two little ones still at home it feels like a break.

So while I sneak back into my routine I thought I would pass on a little pattern just in case you feel the need to whip up a few small things yourself...They go perfect with that morning cup of coffee or tea
Whatever it may be :)


Little petal coasters.

US Terms
for smaller cream color I used E/3.50mm hook
for the slightly larger red I used F/3.75mm hook
Yarn- Knit Picks Cotlin DK


row 1: Ch2 work 8 sc in first ch space join to starting ch.

row 2: ch 3, dc in same space, *ch1 dc in next sc, ch1 dc in same sc. Repeat from * ,ch1 slip stitch to second ch of starting ch.

row 3: slip stitch in next dc, slip stitch into ch1 space, ch2, dc in same space, *ch1 2 dc in next ch1 space repeat from* ch1 slip stitch to starting ch.
(make sure not to miss ch1 space you initially slip stitched over :)


row 4: ch1, sc in next dc, ch1 over ch1 space *sc in next two dc's ch1 over ch1 space repeat from* slip stitch to starting ch.
(so you are sc'ing in each dc and ch'ing over each ch space)


row 5: slip stitch in next sc slip stitch in ch1 space, ch2. *sc in next ch1 space ch2 repeat from * joining to starting chain.
(so you are sc'ing in each ch1 space and ch'ing over the sc's)

row 6: ch1 work 3 dc's in same space, ch1 sc in ch2 space, ch1 work 3 dc's into next sc repeat from* ch1 sc in last ch2 space then slip stitch to starting ch.


12.10.2010

Crochet Ribbon Tree


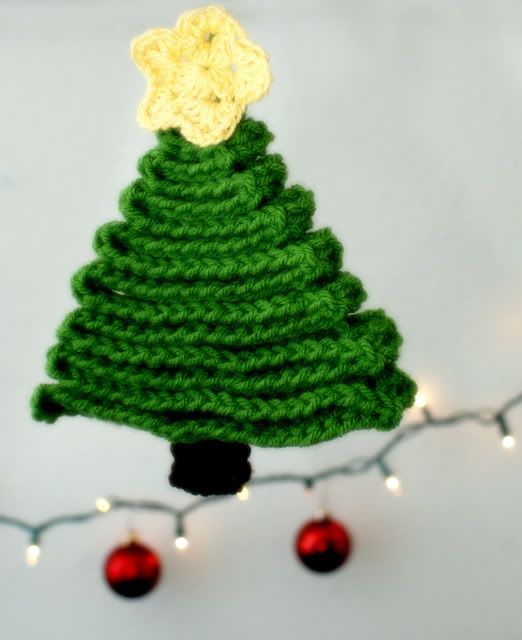
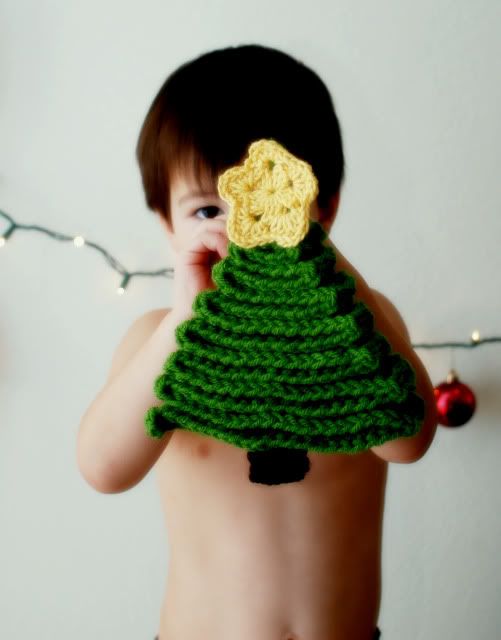
I had another go at my  Christmas tree. Think this time I got it more like what was in my head. And the first thing that comes to mind is that old ribbon candy you get when you visit the grandparents. Isn't it cute??

Here is what I did....

  • I chained 202 with a J hook and worsted yarn.
  • DC'd in 3rd chain from hook and every remaining chain,
  • I then fastened off leaving a very long tail.
  • I folded  it on top of each other like the ribbon candy back and forth starting from the bottom, working up and making it smaller as I went to the top.."obvious I know"
  • With the long tail on the top I used the hook and pulled it through each tier on one side down to the bottom corner across the bottom and back up other side.  Then pulled it down the middle across 2 dc's on the bottom and back up to the top.
  • Straighten it all back out (mind bunched up a little as I did this) and fasten off leaving a bit of a space for hanging. 
  •  Add two rows of HDC of brown in the four middle dc's on the bottom for trunk
  • And attach a star.  "I attached my star as I weaved the tail up through"

Star Pattern
  • Ch 3, 2 dc in first chain. *Ch2 3 dc, repeat from * 3 more times. ch2 and slip stitch to beginning chain
  • Slip stitch to first ch 2 space. Ch1, hdc, dc, ch1 dc, 2 hdc, in next ch2 space *2hdc,dc, ch1, dc, 2hdc. Repeat from*  3 more times. slip stitch to bottom starting chain  and fasten off.


Progress Report...
 I am halfway finished with the Dottie Angel blanket as well, and is already being broken in. By the munchkins.


11.20.2010

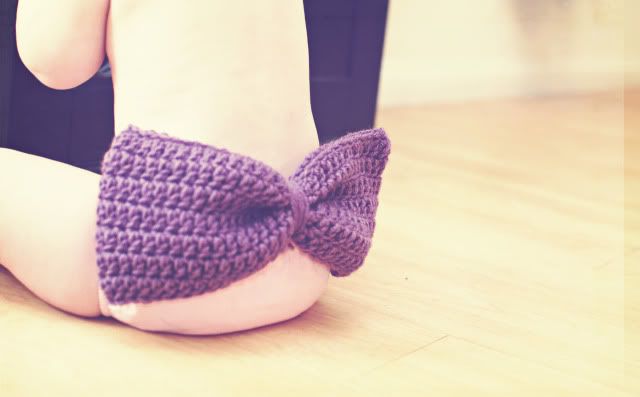
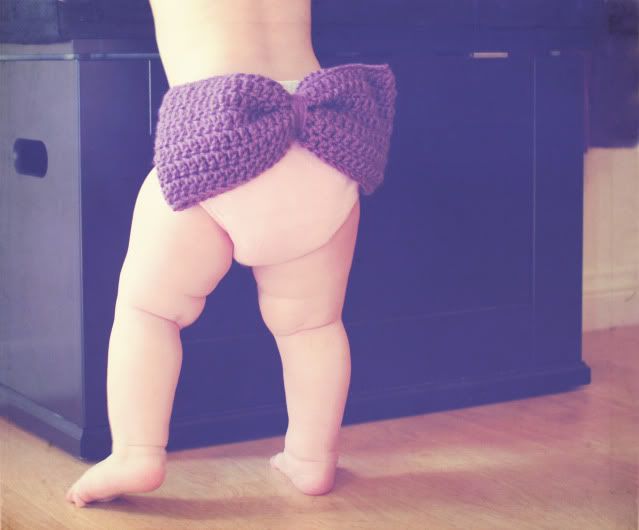
The biggest bow...

Nothing like a quick project to make you feel like your in the swing of things again. And believe me I have been feeling so out of sorts it was necessary.


So today I made this bow and thought a little accessorizing would be fun...


I think the possibilities for cutesy photo shoots are endless with this thing.
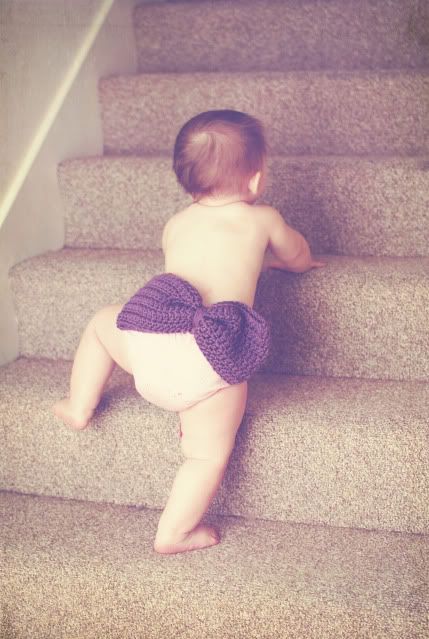
But the only place I could get Sophie to leave it alone was right on her cute little tush, so there it stayed.


As I chased her through the house and up the stairs. She refused to sit still, it's almost like the sound of the shutter gives her crazy energy. So much so you would have thought she was on a sugar high.


But I eeked out a few cute shots and she remained happy so I can't complain.

These darn things are so cute and easy so if you want to make one this is what I did..


With worsted yarn and J/6mm hook
Ch 60 join to first chain ch2
DC for 7 rows
Flatten with working yarn in middle and wrap around evenly
Fasten off..
I took chunky yarn braided it and pulled through the wrapped yarn to tie around her waist but you could do anything with this concept and make it your  own.


11.10.2010

A first for me...

I actually got the nerve up to sell one of my patterns. It's amazing how nail biting it is to put yourself out there like this. I really hope people who buy it really enjoy the pattern and  more importantly that I didn't miss something when I transferred it over to the PDF file.  Which by the way I owe a huge thank you to all who gave me info on how to do.  And since I would really love a few projects in Ravelry I will send this pattern to the first 3  Crochet Ravelers that leave a comment and want to make this poncho. Oh and this pattern is for a toddler sized poncho. Although with a bit added length my 3yr old could easily fit it. Especially if you use the bulky yarn suggested...

And in case you are wondering what pattern I am talking about.....


Remember this??


10.07.2010

Strawberry Beret

You can always count on a random hat pattern from me every now and then. So to not disappoint here is one I whipped up today. Although nothing like the actual Strawberry Shortcake hat, it still sort of reminds me of hers so I will just call it the Strawberry Beret.


The best part is this hat is insanely quick and easy to make. In fact the mini photo shoot to show it off proved more time consuming then actually making it.
No Kidding....


Figured you might want to make one too..

Super chunky yarn, I used Rowan Spray
Size K hook..6.50 mm
this makes about a 12 month size but can be easily  up sized.
US terms

(Ch3 counts as dc)

Row1 Ch 4, dc in 1st chain 11 times, join to 4th ch. of starting chain (12)

Row 2 Ch3, dc in same space, 2 dc in each stitch around join(24)

Row 3 Ch3 *2dc in next dc, 1dc in following, repeat from * ending in 2 dc join (36)

Row 4 Ch3, dc in next 4 dc's, *2 dc in next dc, dc in next 5 dc's repeat from * join (42)

Row 5 Ch3, dc in each dc join
Row 6 Ch3, dc in each dc join
Row 7 Ch 1 sc in each dc join

Row 8 Ch 1 sc in next 3 sc's, *sc 2 tog, sc in next 4 sc's repeat from * join

Row 9 Ch 1 sc in each sc, join
Row 10 Ch 1 sc in each sc, fasten off


Get cheeky with it  :)

10.04.2010

Trivet Fancy... Pattern


Ikea cork trivet
E hook/ 3.50mm
DK weight cotton blend yarn, I used knitpicks cotlin
------
US terms
(normally a cluster is worked over multiple stitches in this pattern it is worked in the same stitch)


Ch 6 join to form ring.

 row 1     18 sc in the ring join to first sc
 row 2     ch 3 in same stitch work a 2 dc cluster  (you should be working 2 dc's together with only one stitch resulting), * ch 3  skip 2 sc's work a 3 dc cluster ( 3 dc's together with only one stitch resulting) in the next sc.
repeat from * til end, stlip stitch to beginning ch.
row 3      ch 3, dc in first cluster, ch3, 2 dc in top of same cluster,  * ch 3, 2 dc in top of next cluster, ch 3, 2 dc in same cluster.  repeat from * til end. join to beg. ch.
row 4       sc in between beg ch and dc, ch 5, sc between next 2 dc's, * ch 5 sc between next 2 dc's. Repeat from * , after last sc ch 3 then dc in first sc of the row.
row 5      ch 1, sc in top of dc then ch. 6, sc in ch 5 space, ch 6, sc in top of next ch. 5 space.
Repeat from *  after last sc, ch 3 then dc in starting sc.
row 6      Repeat previous row adding one extra chain between Sc's so it will be ch 7.

fasten off.

For the back you are simply working in the round.
starting with 12 dc in a loop.
ch 2,  dc in same space  and 2 dc in each space.
ch 2, *2 dc in next space 1 dc in next repeat from *
ch 2,  1 dc in next dc  *2 dc in next dc 1 dc in next 2 dc's repeat from *
ch 2,  1 dc in next 2 dc's * 2 dc in next dc, 1 dc in next 3 dc's repeat from *
ch 2   1 dc in next 3 dc's * 2 dc in next dc, 1 dc in next 4 dc's repeat from *

Row 7  is the joining round, sandwich the trivet in between the two sides. working in hdc instead of dc.

ch 2, slip stitch to any ch 7 space of top piece, * hdc in next 5 dc's, 1 hdc in next dc slip stitch to next ch 7 space from top piece, hdc in same dc.  repeat from * fasten off

More pictures HERE

9.12.2010

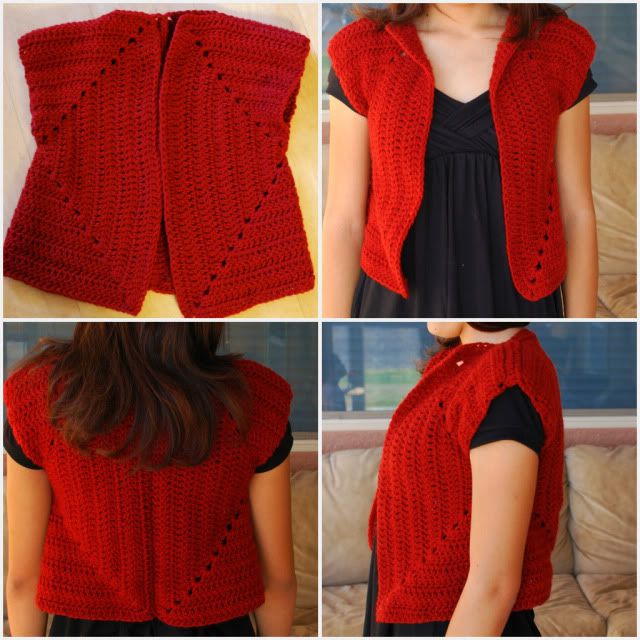
The Squared Vest

I think it's safe to say everyone loves simplicity in design. So when you can alter a simple shape and create something pretty darn cool. What's not to love? Which is why I wanted to see if this idea in my head would work and when it did, I of course had to share it immediately... This is so simple I don't even know if it's been done before but I haven't seen it and a quick scroll through Ravelry didn't produce anything so here is the pattern :) 

US Terms
 6mm/ J hook
worsted weight yarn
used Vanna's choice


 how-to / pattern

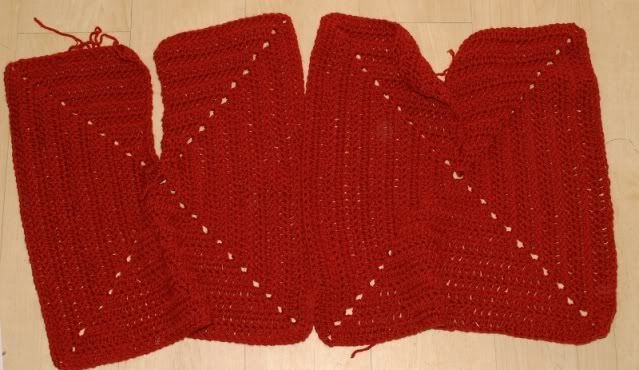
Basically you are working two Double crochet squares  and with the exception of the first round  you are not joining instead working back and forth creating a slit down  the middle of one side of the square (these will be your armholes)

You will need to make 2 squares, for a small  I  worked 13 rounds, but this is easily up sized with more rounds. This used about 3skeins of Vanna's choice.

Pattern
Row 1: ch3, 3 dc in first ch. *ch 2 , 4 dc in same space. Repeat from * twice more. slip stitch into starting chain.
Then slip stitch over following dc stitch to second dc.

Row 2 : ch2 turn, dc in previous slip stitch [2dc ch2 2dc] in ch2 space, *dc in all dc's [2dc ch2 2dc]  in ch2 space Repeat from * twice more. DC in last few dc's after 4th ch2 space (do not join). Ch2 turn.

Row 3 :  ch2 counts as dc, *dc in next dc and across to ch2 space [2dc ch2 2dc]
repeat from* around working dc's in remaining dc's after 4th ch2 space making sure to dc in the turning ch. remember it counts as dc.

repeat row 3 for square pattern til you've reached the size wanted.


I tried to get all angles of the vest to make assembly easy but if you have any questions don't hesitate to ask.

To assemble you simply sew the two squares together down one side (creating the back), with the slit sides on the top, then fold each half over so that the slits are on opposite ends which will create the armholes once the top of each side is sewn together starting from the outside and working in.  I stopped 7 stitches short of each end toward the neck.weaved in all ends, and that's it!

8.04.2010

My Creative Space...

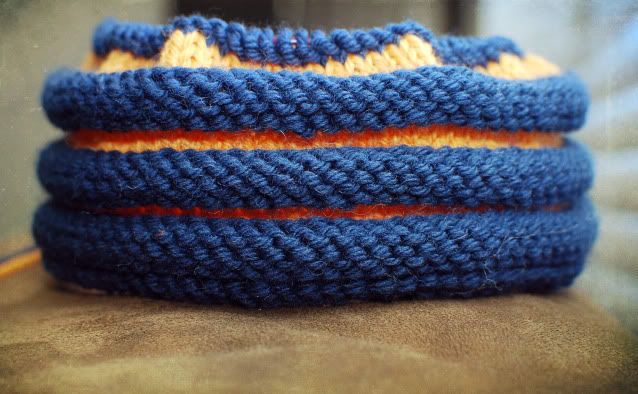
Started on a hat for Shay last night....It's roughly the same pattern as the pink version I made for Sophie a few months ago.  Love that it's working up pretty quick now that my knitting skills are improving a bit. I just wish I had more time to be crafty but the A's are getting ready to go back to school tomorrow so I am sneaking in a few rows here and there until things get settled....I'll take what I can get for now :)


My mods for the 3 yr old kind

cast on 77 w/ us 7 circs
knit 4 rows (blue) 
purl 4 rows (blue)
*change color knit 4 rows (orange)
change color knit 1 row purl 4 rows (blue)

 repeat from *  until it's decrease time. After 5 purl ridges are complete  then start decreases...keeping with same color setup..

knit 1 round, repeat k5, k2tg on 2nd round, knit 2 rounds (orange)
knit 1 round , purl 4 rounds (blue)
knit 1 round, repeat k4, k2tg on 2nd round, knit 2 rounds
knit 1 round, purl 4 rounds
knit 1 round, repeat k3, k2tg on 2nd row, knit 2 rounds
knit 1 round, purl 4 rounds
and so on..
k2, k2tg
k1, k2tg 
knit 1 round, purl 4 rows
knit 1 row
k2tog for last three rows ...


Big thanks to Kirsty for hosting MCS..

7.23.2010

Triple Crochet Beanie


Any excuse for a photo shoot......

And pattern....

US terms
6-12 months

DK/G hook

SC=single crochet
HDC=half double crochet
DC=double crochet
TRC=triple crochet

Chain 3..DC 11 times in first chain, slip stitch to starting chain.
Chain 4...TRC in same stitch and twice in between each of the dc's in first row, join
Chain 4....TRC  twice in between next stitches and once in between the following stitches.  repeat from  join
Chain 4....TRC once in between next two sets of stitches then 2 Trc's in between next stitches. repeat, join
Chain 4....TRC in between each stitch for entire row join and repeat twice more.
HDC in each stitch with alternate color, join

Slight ear flap
SC 9x, *2 hdc's, 2 dc's, 2trc's ch1 2trc's, 2 dc's, 2 hdc's*, SC 18x, repeat**, SC til end of row.

Loop long strands through ch1 space in ear flap braid and tie off.


5.23.2010

Counting Sheep....


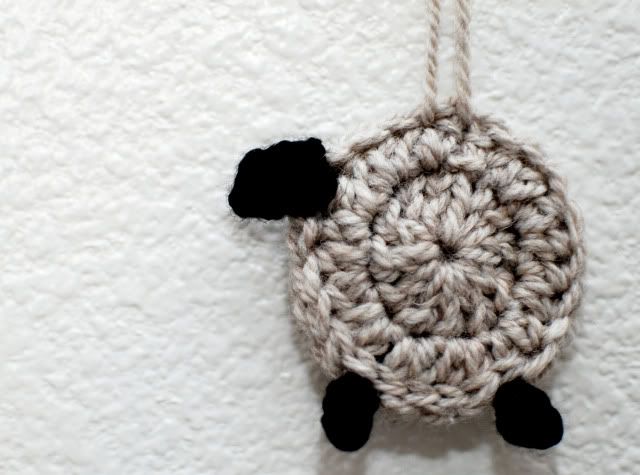
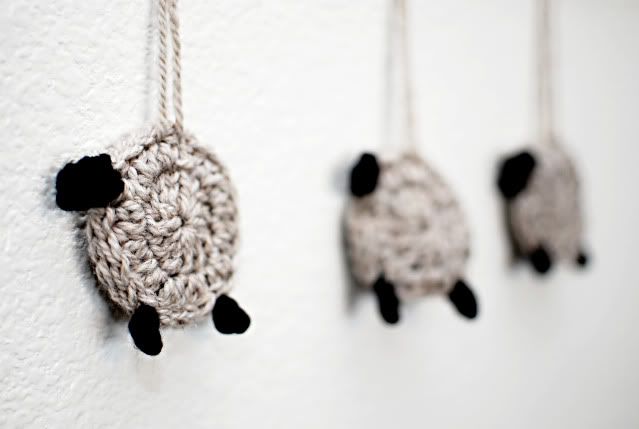
Seems I am on a bit of an animal crochet kick...Thinking these would be adorable as a mobile , maybe even add some felt numbers on them? Or maybe I will just string them over Shay's bed with added numbers so he can count his sheep to sleep.....


 If you crochet you can tell these are pretty self explanatory in the pattern dept.  But if you are a little unsure....

Crochet in the round for 2 rows....

( make two )
Chain 3, 11 dc in first chain join, ch2
hdc in each dc two times til end join and fasten off , leaving a long tail on one to attach both sides together after legs and head are made...

Legs, Head

For the legs attach black yarn through one of the hdc's chain 2, sc in first chain then slip stitch through hdc again and fasten off..

For  head, attach yarn like for feet and chain 3, sc in first 2 chains then slip stitch through hdc again and fasten off...

Then take both sides of body  and slip stitch the long tail through each stitch til end and fasten off....

5.13.2010

Lamby hat pattern.


Hat 6-12 months
You could always use your own style hat and add the ears too but here is mine :)

US Terms

J/6.00
Bernat Softee Chunky "pictured" but a softer worsted would probaby be ideal
double stranded yarn to make it more "hat" like.

Row 1
 Ch. 3
8 hdc in first chain join

Row 2
ch. 2 hdc in next hdc
2 hdc in each hdc join

Row 3
 ch. 2
1 hdc in first hdc, 2 hdc in next hdc, repeat til end. Join

Row 4
ch. 2
1 hdc in next 2 hdc then 2hdc, repeat til end. Join

Row 5
ch. 2
1 hdc in next 3 hdc's then 2 hdc repeat til end. Join

Row 6/11
 ch. 2
1 hdc in each hdc til you have 11 rows...

Row 12
1 sc in each hdc

If you want it bigger then this.. row 6 would be 1 hdc in next 4 hdc's then two hdc....If that would make it too big you can in crease every 5 stitches instead.


Ears
 also double stranded.


Chain 6+3, 1 dc in 6 chains..ch 3 turn 5 dc. ch 3 turn 5 dc til you have four rows.

Row 5. Ch 1, hdc in next stitch (not turning stitch) 2 dc’s 1 hdc and 1 sc. fasten off.

Sew ears on upside down so they flop over.

For lamby face it's pretty self explanatory, no real skill there on my part haha...basically just a black line of double stranded yarn across a few stitches and went down on each side and middle for lashes and just down the middle for the nose.

Come back and share if you make one.

The "wip" bag pattern....

First off, get the biggest hook you can find. I think this is a size P 15 


Ok now triple up on the yarn, "worsted"


Start out with Ch. 3 

Row1:  Sc in first Chain 8 times slip stitch to 2nd chain.  

Row2:  Ch 1, 2 Sc in each Sc

Row3:  Ch 1, 2 Sc in first Sc 1 Sc in second continue with 2 stitches on every other Sc

Row4:  Ch 1, 1 Sc in first Sc, 2 Sc in second, *1 Sc in each of next two Sc's then 2 Sc in next stitch* continue ** ending with 1 sc in last stitch before slip stitch into ch. 1

Row5:  Ch 1, 1 Sc in first two Sc's, *2 Sc's in next Sc, 1 Sc in next 3 Sc's* continue ** ending with 1 Sc in last stitch before slip stitch to ch 1

Row6:  Ch1, 1 Sc in first 3 Sc's, *2 Sc's in next Sc, 1 Sc in next 4 Sc's* continue ** ending with 1 Sc in last stitch before slip stitch to ch 1

You can continue in this pattern till you get the size that you want or just stop here like I did and go up...

After you have reached the size you want simply stop adding and crochet in each Sc around til you get the bag as tall as you would like. 


Be creative with the strap and there ya go...I plan on buying a canvas strap for mine and just sewing it together in a loop after weaving it through the bag. Any questions please ask!!

3.17.2010

Simply Slouchy Beanie pattern

I am finally getting a Creative Space in this year. I was curious and recently added a statcounter here, I was surprised to see a ton of people have looked up my previous slouchy pattern so I thought I would make another one with my new style of closing the top. So I hope people let me know when and if they try this one out. It's about as simple as it gets so the beginner can give this a go...If you have any questions please ask away. I'm eager to help


Doesn't my daughter look thrilled ...haha

US terms
Ch.....chain
HDC....Half double crochet
SC...Single Crochet


J hook
worsted weight yarn

Ch.55  join

row1... ch2 hdc in each ch. join

row2-24... ch2, hdc around, join.


Turn "tube" inside out pull working yarn through. Pinch into "plus sign" shape (see picture) creating 4 corners with working yarn at the end of one corner SC to center.  Slip stitch up to the end of next corner, then SC back down to center repeat for 3rd corner and  lastly SC straight up the 4th side fasten off at the end of the corner.

flip right side out VOILA!!!

1.13.2010

Flower Power head band tutorial


Abbreviations/ US terms
Ch. -Chain
Sl St - Slip Stitch

SC - Single Crochet
HDC - Half Double Crochet
DC - Double Crochet
TC - Triple Crochet

Lion brand yarn with... I /5.5mm hook used.


Ch 31

Sc in 2nd ch from hook
Ch 2 skip 1 ch sc in next ch. til end, sc in last ch. , ch1 turn  (each ch space will be one petal)

 Petals 1-3: 4 hdc sl st ch1 in ch 2 space.. x3

 Petals  4-6: 2dc 1sc 2dc sl st ch 1.. x3

 Petals 7-9: 1tc 1dc 1hdc 1tc 1dc ch1 sl st ch1.. x3

 Petals  10-15: 6 tc ch1 sl st ch1.. x5

1 sc in last sc...


Fasten off leave long tail for securing petals together...

twist petals together tightly and line up last petal next to the 10th petal  (first tc petal)

secure all petals in place by weaving beginning and end tails through entire flower..

I work through the center and weave back and forth catching all petals in
each row through ch 2 spaces. once all are secured fasten off.

Create a braided head band as thick or thin as you like about 24 inches long...
Weave through back of flower double knot at desired length to fit head and
pull knot behind flower so remaining braid hangs next to flower and VOILA!!!

If you find anything weird, or have any questions  feel free to ask...And make sure to let me know if you make one...:)

10.29.2009

Time for me...

Well after a somewhat stressful, running around, taking care of everyone but me. Kind of week up until this point. I figure I deserve a break.... Right??

So when I wake up to find a "Tornado Watch" flashing across my TV screen. And a not so lovely day outside.


It was proof that I was meant to snuggle in eat brownies and crochet the day away. While convincing Shay he really wanted to play in his room... Ok so maybe that part of the plan had a few kinks in it but..I'd say so far so good....


I started and finished a little hat for the baby. After all it has been quite a few days since I crocheted one. I was beginning to have with drawls. And from the looks of it Shay approves.


It's just a simple HDC hat with a small ribbed edge that I have never done before but figured it would be a nice touch...I especially like that it flares out just a bit so it won't hug her forehead too tight...


The quick version..I obviously switched color each round and fastened off each time as well. I find it easier to keep the seam cleaner this way..:) haven't measured it yet but I am sure this will fit about a 3-6 month old..And of course as usual you can go up hook sizes to increase size...

HDC, Crochet hat pattern.

US Terms

F/3.75mm

Worsted

Row 1 Ch. 3
11 hdc in first chain join

Row 2 ch. 2 hdc in same stitch
2 hdc in each hdc join

Row 3 ch. 2
2 hdc, 1 hdc repeat til end. Join

Row 4 ch. 2
1 hdc in next 1 hdc then 2hdc repeat til end. Join

Row 5 ch. 2
1 hdc in next 5 hdc's then 2 hdc repeat til end. Join

Row 6/13 ch. 2
1 hdc in each hdc til you have 13 rows...

This part is a bit tricky to explain so I apologize if I confuse you but once you get it going it's pretty simple..You are basically working in the chains/sc's and slip stitching to the hdc to connect.


Ribbed edge.

Row 14 Ch.5 working in the chain not the next hdc..
SC in each chain (4 sc's) then slip stitch into next hdc.
turn working back up SC in back loop of each SC. Turn
Ch.1 SC in each SC "both loops*

Repeat for rib pattern til end slip stitch into first chain row..

10.19.2009

Comfy slouch beanie pattern (crochet)

I have created another slouchy pattern HERE

This hat pattern starts with the pink color (if you are looking at the picture.) the brown edge is added last.

US Terms

Hook, I/9-5.50mm

Ch. 66 for a teen/adult size

SS to first ch., ch. 2

Row 1: 2 hdc in 2nd chain *skip next ch, 2 hdc in next ch; repeat from * across. hdc in last chain remaining ch. SS to beginning ch. 2

Row 2: Ch 2, hdc in first stitch, skip next hdc, 2 hdc in next hdc, *skip next hdc, 2 hdc in next hdc; rep from * across. slip stitch into ch.2

Row 3: Ch 2, hdc in 2nd stitch skip next hdc, 2 hdc in next hdc, *skip next hdc, 2 hdc in next hdc; rep from * across. hdc in same space as beginning ch.2 ss to ch 2.

Repeat rows 2 and 3 for a total of 8 rows....


Change color (if you want)...Rows 9-17

Start each row with ch 3 and join to each beginning chain at end of row.

DC in each stitch
DC in next 10 DC's then DC 2tog throughout row (after every 10 dc's dec.)
DC in next 8 DC's the DC 2tog throughout row (after every 8 dc's dec.)
DC in next 6 DC's then DC 2tog throughout row (after every 6 dc's dec.)
DC in next 4 DC's then DC 2tog throughout row (after every 4 dc's dec.)
DC in next 2 DC's then DC 2tog throughout row (after every 2 dc's dec.)
DC in next DC then dc 2tog throughout row (after every 1 dc dec)
DC 2tog in each remaining stitch (dec every dc)
Hdc in each remaining stitch

fasten off leaving a long tail to weave through hdc's tighten and tie off...

If you would like to add extra length or more color contrast you can do like I have and add 2 rows of hdc in the beginning of the hat. Super easy addition :)

If you have any questions or find any errors please let me know..I wrote this with a 2 yr old climbing all over me lol...

9.28.2009

Crochet hat how-to pattern


You can make this hat in any size you want, super easy and pretty darn quickly too..
Hook size and yarn don't matter..Just make sure to have a measuring tape handy..

My Example
Baby - 3 to 6 months
Head Circumference: 14" - 17 "
Hat height= 6.5 - 7"


Decide what size you want to make then check out the crochet hat size chart..

1. Start with a chain measuring half the length of the head circumference that you are going for...I go for the bigger inch circumference (14" - 17") so in this hat circumference I made my chain a little over 8 inches...


2. Sc first row, chain 2 turn and HDC next row, chain 2 turn and DC 3rd row..."you are working back and forth"

3. Once you get to the DC row continue until you have almost doubled the height length...Then one row of HDC and final rown of SC.(6.5 - 7") total length should be close to 14 inches..

4. Flip it in half and sew the side seams up...I just use a slip stitch...You can use the seam side out or turn it inside out and use the other side...I flipped mine...

5. Lastly use the same yarn take 2 strands long enough to tie in a bow...Thread strands through each corner then tie together :)...There ya go!!!