Showing posts with label pattern. Show all posts

11.13.2011

Back at it...

I apologize for my absence. It has been a very busy and stressful few months. We have moved, bought our first house (which is a fixer upper) and the hubby has just recently deployed to Afghanistan. Among other things of course. So while things are not in as much order as I would have hoped they would be at this point. I am finding it necessary to pick up the crafts again.

My brain is jumping with ideas and I miss sharing them here....

So with that, I made a little ear warmer headband today, thought I would share...


J hook/ Worsted
US terms
Size: Adult

3sc per inch/ 2 clusters per inch

2dc cluster: *YO insert hook in st or sp indicated, YO and pull up a loop YO and draw through 2 loops on hook; repeat from * once more, YO and draw through all 3 loops on hook.


Ch 56, join to starting ch.

Working in each chain accordingly..

Row 1: ch1, 7 sc, 4 hdc, 32 2dc cluster, 4 hdc, 8 sc, join to starting chain.
Row 2: Repeat Row 1 fasten off.

Turn and work on opposite side of starting chain (starting chain will become the middle)

Repeat Row1 and 2  making sure you are working with both front sides outward.

Embellish with flower/ribbon/button etc. if desired and keep warm. :)


8.05.2011

Granny Square top tutorial


This top is very versatile and can be made in any size and use most any yarn. The pattern starts after working the size of the granny square needed to fit across chest and slightly wrap around side. I made a 2t size with worsted yarn and H hook.


Make 2   *front and back


Front
Starting with a 9 row granny square.


Row 10..slip stitch to ch2 space, slip stitch in ch2 space 2x, ch2 2dc in the corner space work in pattern to 4th corner (leaving last side un-worked/neckline) work 3 dc in that corner.


Sleeve 1... 
Ch3 turn, work in pattern til you have 5/3dc groups ch2 turn hdc evenly across ending with 2hdc in the starting ch3 space. Ch2 turn repeat hdc row back down sleeve. Ch1 turn sc across working 2 sc in ch space below.


Work Sc evenly across top of granny square (this is the neck line) 


Sleeve 2...
Ch3 work granny pattern in next 4 ch1 spaces in 5th space 1 dc ch2 turn hdc evenly across working 2 hdc in ch3 space. Ch2  work  hdc across. Ch1 turn sc across 2 sc in corner and sc across top til you reach sc worked for neckline. (about 5 sc) slip stitch and fasten off.


Repeat for back

You now just need to join them together. You can pretty much do this any way you like  but I like to have a little give in between them so I have written up the way I like to do this. Hopefully it is not to confusing for you.


Joining side seams
Put right sides together. Starting with the top layer in the ch2 space of bottom corner. Make your starting loop pull through the top layer of ch2 space, Ch2 and slip stitch from front to back of bottom layer.  *Yarn over and dc into the next stitch in the top layer. Then from front to back in the bottom layer insert hook and pull yarn through both loops on hook. Repeat from * Work up to the bottom sleeve seam then sc the two sleeves together and fasten off.


Repeat for other side seam. 


Joining neck line..
Starting from top corner shoulder seam work the joins the same as side seam til a little after the sleeve for both side. (about 10-12 stitches)


Weave in all ends and turn right side out. 


To finish it off I like to add a few rows of hdc (unjoined) to the front and back of the bottom edge                   


Hope you enjoy and please let me know if I forgot something or if you have any questions...:)

7.09.2011

Cool Kid Beanie

I know I have been quiet lately but with summer, the impending move next month and just life in general, I haven't had much time for much else. That being said I do plan on getting at least a few more patterns written up this month so now that I have finished up The Cool Kid Beanie  I am off to the next.

This thing can be made in pretty much any size. So here is me in the Adult version :)


If you want to make your own Cool Kid Beanie I just recently added the pdf to Ravelry for $1

Enjoy!!!!

4.22.2011

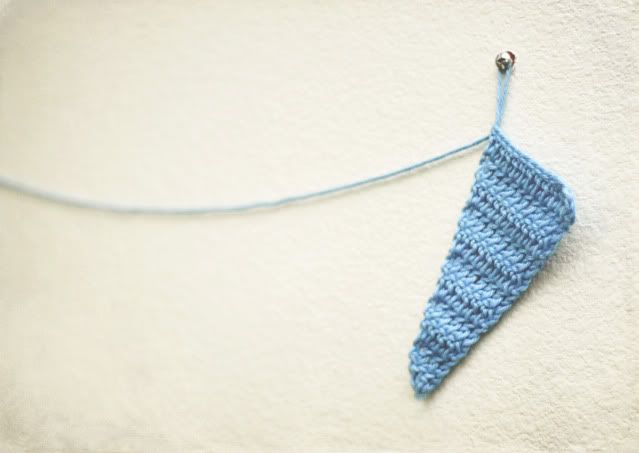
Sweet and Simple bunting....(pattern)


US Terms,
G hook
Knit picks /shine worsted

(Ch 2 counts as dc)

Ch3
Row1: 2 dc in first chain (3dc)
Row 2: Ch2 turn. Dc in same space as ch2, dc in next dc and in starting ch  (4dc)
Row 3: Ch2, turn. Dc in same space as ch2 dc in remaining dc and turning ch  (5dc)
Repeat Row 3 until you have 13 dc's in a row or for 11 total rows.


As you can see you can easily shorten or lengthen the size of your bunting.


For the connecting "ribbon"

Ch25, sc across top of bunting ch5 sc across next and so on ending with ch 26,
turn and sc in 2nd ch from hook and in each space across. Fasten off.


4.12.2011

New ideas


Yes that's right, another hat pattern in the works. I think I have the actual pattern worked out just need to work on sizing and writing it all down.

Thank you everyone for your sweet comments on my recent patterns. It really gives me motivation to keep on racking my brain for new ideas.


As for this new pattern, I played around with a simple stitch pattern until I
got this idea. I am really enjoying it, but it does take a bit more time to work up.
So keep an eye out will ya :)